We were on a photo walk 18 months ago when a friend showed us how to photograph waterfalls. Just as you can move from 'Auto' to 'Aperture' setting, you can also move to 'Shutter' priority. This is the trick you use to get those beautiful misty pictures of waterfalls like this one.
These are the two pictures I took of Eugenia Falls that day. I reposted one like this just a week or two ago when I showed the falls totally frozen. Previously I had always tried to 'stop' the water to get a nice sharp picture (as in the photo below), but once I learned how to slow it down instead, I think it makes a much better picture (as above), and I now try to shoot all waterfalls this way.
To change from what I used to photograph, I set the camera to 'Shutter' mode, and then set the speed down to about 1/8 of a second. This gives time for the water to move, giving this effect (as in the first photo). But of course it would also make the rest of the picture all blurry. So you need either a tripod, or you need to brace yourself against a tree and hold things really still. I have found I was actually able to shoot all this ones just by bracing myself and holding the camera steady.
Hogg's Falls is probably my favourite, and you've seen this picture or one like it before on this blog. In doing this, you need to watch for a message that says 'Too Much Light' or 'Too Bright', because 1/8 of a second is a long exposure. You then need to set the ISO down to its lowest setting - on my camera 100. That makes the light sensor less sensitive, and hopefully gets you the right exposure.
I have also played around with exposure compensation as I discussed yesterday, as well as varying the shutter speed somewhat, from as low as 1/4 up to 1/10th. But as I've said before, with digital, you can change settings slightly, and try as many shots as you like.
Here's a final pair of pictures of Inglis Falls in Owen Sound, taken last November. I think I"ve posted them before too, but they illustrate well the two approaches to taking waterfall shots. In my mind, a very good reason to move beyond the 'Auto' setting. Which do you prefer?
I have more I want to say about what I've learned about photography, but I'll leave that til later and return to my usual seasonal reports on the valley tomorrow. I did finally see my first robin today, only 3 weeks later than usual!


Tips I'll have to keep in mind. Your waterfall shots are stunning!
ReplyDeleteInformative as usual.
ReplyDeleteBeautiful photographs.
ReplyDeleteWhen shooting waterfalls, I always use a polarizing filter (or you could use a neutral density filter). The polarizer helps balance out the bright white water, and cuts the light so you can use a slower shutter speed. I typically use a small aperture (f16-ish) and find a shutter speed of a half second (1/500) works well. And when shooting waterfalls, I always use a tripod. Check out my November 2013 post titled "Finding Gold at Silver Falls" if you'd like to see some examples.
ReplyDeleteThanks for your helpful comments. Your waterfall pix on that post are amazing!
DeleteThanks for the tips. What a difference playing with the settings can make. And thanks for visiting my blog.
ReplyDeleteI like them both, but the last one would probably be my first choice - I like the soft look of the water when the shutter is slowed down.
ReplyDeleteThough both are great pictures I like the second one best. What a difference. The water looks like liquid satin.
ReplyDeleteI love waterfalls but know nothing about photography!! I use my Nikon as a point and shoot!! These images are all beautiful!!
ReplyDeleteWell done, I enjoyed your photo series! :)
ReplyDeleteI love the blurred water on the one in the brown woods. I used to do those on the SLR, but haven't figured out the digital.
ReplyDeleteBeautiful silky waterfalls. I took a couple of photography classes in 2012 not long after I got my first DSLR, and it is one of the best things I ever did; opened up a whole new world for me, and made this cherished hobby that much more fun. I no longer use the auto setting since I prefer to tell the camera what I'd like to get done, and although I still have so much to learn, I am enjoying myself along the way. If you don't have one already, pick up a polarizing filter; you will love it! There are so many great articles and videos on the internet that will teach you how to use it. And if you really feel generous with yourself (haha), add a neutral density filter to your camera bag. They are great for waterfall images amongst other things.
ReplyDeleteA very attractive set of waterfall pics. I love doing waterfalls, and look for opportunities everywhere I go. However here in southwestern Ontario there aren't many opportunities close at hand, so a bit of travel is in order. Hogg's Falls is one of my favourites, and I have been there half a dozen times. The lower level of it is especially intriguing. I almost always use a tripod and a combination neutral density/polarizing filter for the longer exposures which give the silky smooth look to the water. The Waterfalls of Ontario book (and web site) is invaluable to have! I've posted quite a few shots from time to time of different Ontario waterfalls on my blog.
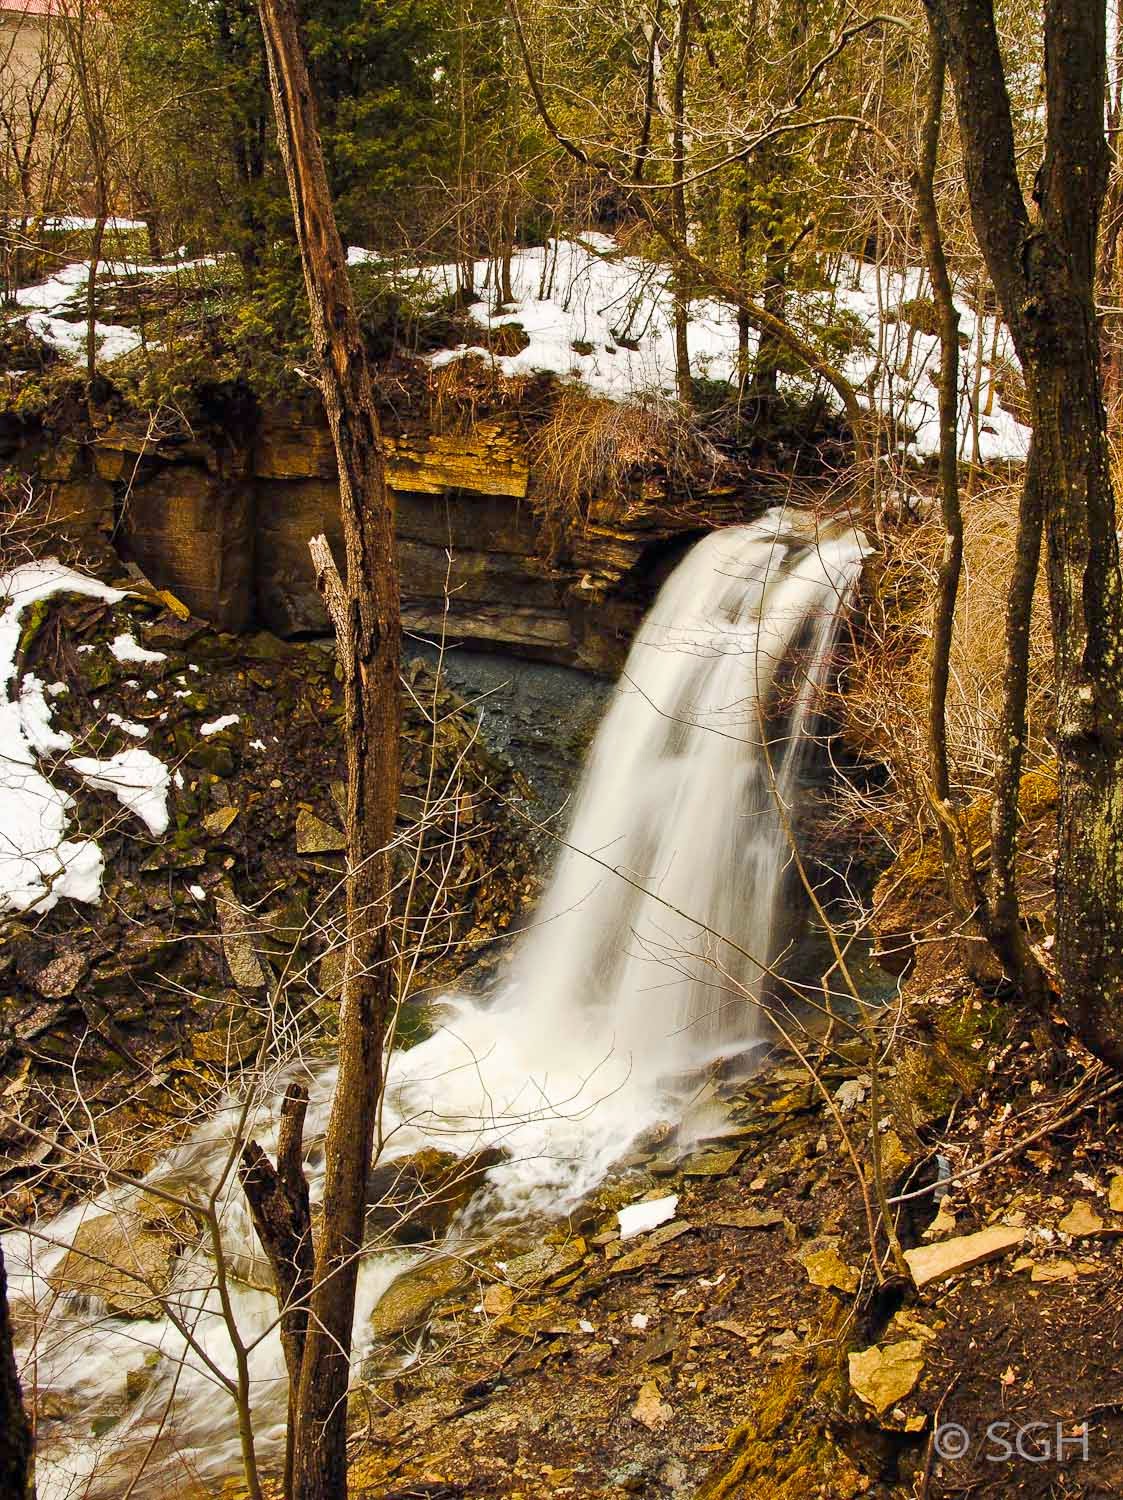
ReplyDeleteQuestion: as I am always looking for waterfall photo ops, I am interested in the one you've included here between Hogg's Falls and Inglis Falls. It looks a bit like Felker's Falls, but not quite. Is it reasonably accessible? The name and location would be much appreciated.....thanks!
ReplyDeleteAllen, that's Webwood Falls, a property donated to the Bruce Trail 4 or 5 years ago, and named by the former owner after his parents. Until now it's only been known by locals, but it was added to the revised 'Waterfalls of Grey County' brochure and website this year. The easiest directions are to follow Grey Rd. 7 straight north of Kimberley toward Meaford, and turn right on Sideroad 25. A mile or more down the road the road bends sharply to the left in order to go around the ravine created by the waterfall. Park before the bend and walk to the north side of the creek where the Bruce Trail goes in. Abut 100 feet in there is the best viewpoint. It's not 'manicured' at all, but a viewing platform is planned, just to keep people off the extremely steep slopes.
DeleteThank-you so much.....this one will definitely be on my bucket list!
Delete